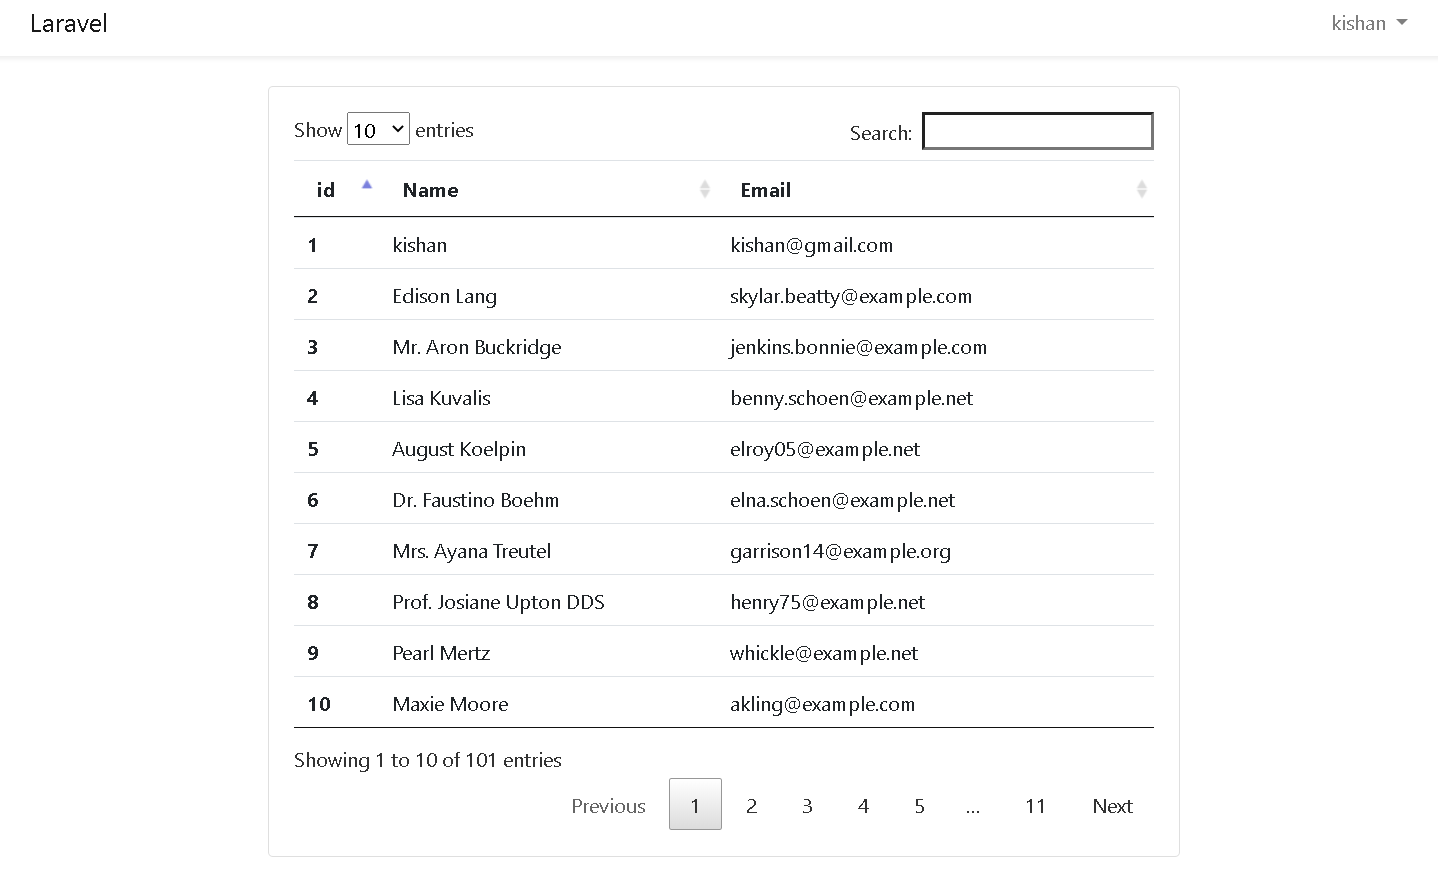
How to use Laravel 7 Datatables without AJAX - JQuery-Plugin
In this article we will learn How to use Datatables in Laravel 7 using JQuery Plugin . Datatable is basically a JQuery Plugin provides us the advanced functionality to our html table for searching , pagination , sorting , filter and advance pagination with low reload time .
We will learn how to use Datatables in Laravel with example . You just need to follow some steps to use Datatables .So let's dive in and see how to use Datatables in Laravel .
Table of Content :
- Install a Project
- Add Authentication
- Migrate Tables
- Insert Mass data using Tinker
- Datatable JQuery Plugin
- Fetching Data from Controller
- View file
- Output
Step 1 - Install a Project :
If you haven't installed a laravel project yet , Use the following command and install a laravel 7 project .
composer create-project --prefer-dist laravel/laravel project-name
Step 2 - Add Authentication :
Its optional that if you want to add authentication , you can add or you can skip also . To add laravel default Authentication ( Login / Signup ) you can use following commands one by one .
composer require laravel/ui
php artisan ui vue --auth
npm install
Step 3 - Migrate Table :
After adding Authentication you need to migrate your tables to store your Authentication data otherwise it will not work . For migration you can use the following command .
php artisan migrate
Step 4 - Mass Input using Tinker :
This step is also optional but it will be helpfull for understanding how JQuery datatables works with mass data in table . For testing pursose it will be very difficult for inserting lots of data in the table . To overcome this we can use php tinker to insert mass data into the table .
Use the following command to use php tinker to insert lots of data inside the table .
php artisan tinker
factory(App\User::class, 10)->create(); // to input 10 random data
Step 5 - Using JQuery Datatable :
We just need to add some JQuery CDN for using datatables . Add the following css CDN just above the </head> tag in your " project-name\resources\views\app.blade.php " .
<link rel="stylesheet" type="text/css" href="https://cdn.datatables.net/1.10.21/css/jquery.dataTables.min.css">
Add the following CDNs just after the </body> tag inside your " project-name\resources\views\app.blade.php " file .
<script src="https://code.jquery.com/jquery-3.5.1.min.js" integrity="sha256-9/aliU8dGd2tb6OSsuzixeV4y/faTqgFtohetphbbj0=" crossorigin="anonymous"></script>
<script src="https://cdn.datatables.net/1.10.21/js/jquery.dataTables.min.js"></script>
<script type="text/javascript">
    $(document).ready( function () {
    $('#myTable').DataTable();
} );
</script>
Step 6 - Fetching Data from Controller :
For using Datatables you don't need to do any changes on your controller . Fetch your data as usual .
homeController.php :
public function index()
    {
        $data=User::all();
        return view('home',compact('data'));
    }
Step 7 - Setting up View File :
The very last thing you need to do is add an attribute id="myTable" on your <table> tag as shown in the following .
<table id="myTable">
    ---------------------
    ---------------------
    ---------------------
    ---------------------
    ---------------------
</table>
home.blade.php :
@extends('layouts.app')
@section('content')
<div class="container">
   <div class="row justify-content-center">
      <div class="col-md-8">
         <div class="card">
            <div class="card-body">
               @if (session('status'))
               <div class="alert alert-success" role="alert">
                  {{ session('status') }}
               </div>
               @endif
               <table class="table" id="myTable">
                  <thead>
                     <tr>
                        <th scope="col">id</th>
                        <th scope="col">Name</th>
                        <th scope="col">Email</th>
                     </tr>
                  </thead>
                  <tbody>
                     @foreach($data as $value)
                     <tr>
                        <th scope="row">{{$value->id}}</th>
                        <td>{{$value->name}}</td>
                        <td>{{$value->email}}</td>
                     </tr>
                     @endforeach
                  </tbody>
               </table>
            </div>
         </div>
      </div>
   </div>
</div>
@endsection
Output :
Thank you for reading this article 😊
For any query do not hesitate to comment 💬

